A necessary preface:
Antennas have always fascinated me. I remember as a child pointing at some 300 ohm TV twinlead coming through the wall of our den and asking my father "What's that for?" I couldn't have been much more than five or six years old at the time, but my memory of it is vivid. And I fondly remember my father patiently explaining how the antenna up on the roof "caught TV picture signals" and the twinlead "carried" the signals from the antenna to the TV set. I imagined frames of TV pictures, one after another, travelling from the transmitter through the air to our TV antenna and down that wire...
A very few years later, a true "eureka" moment occurred by accident. I discovered that when the hand is placed over the ferrite rod coil antenna on my GE AM clock radio, reception was improved by the capacity/coupling effect. I was an antenna.
A farmer's abandoned barbed wire fence was the antenna used with a crystal radio receiver gift from my grandparents. Sitting against a tree, I again imagined, though this time it was of being a spy deep behind enemy lines and tuning in a broadcast from afar.
The effective communications range of my Archer Space Patrol CB walkie talkies was greatly extended with the random length of insulated copper bell wire alligator-clipped to the whip antenna. The wire ran from my bedroom, out the window, out to a pine tree, up the trunk, and wrapped around the trunk many times. I had seen a VHF halo mobile antenna somewhere and thought I'd mimic it. Silly kid.
So it was only natural that as novice op WN1MBK, antenna and antenna-related projects would be near and dear to my heart. Wire was my friend, except for a few wrestling match losses to copperweld. I built a Monimatch from plans in an ARRL book to see my SWR. Then I decided to remove the FWD-REF switch, add an identical meter movement, and thus be able to simultaneously monitor both forward and reflected power. I was very proud of that modification. And then came the antenna tuners...
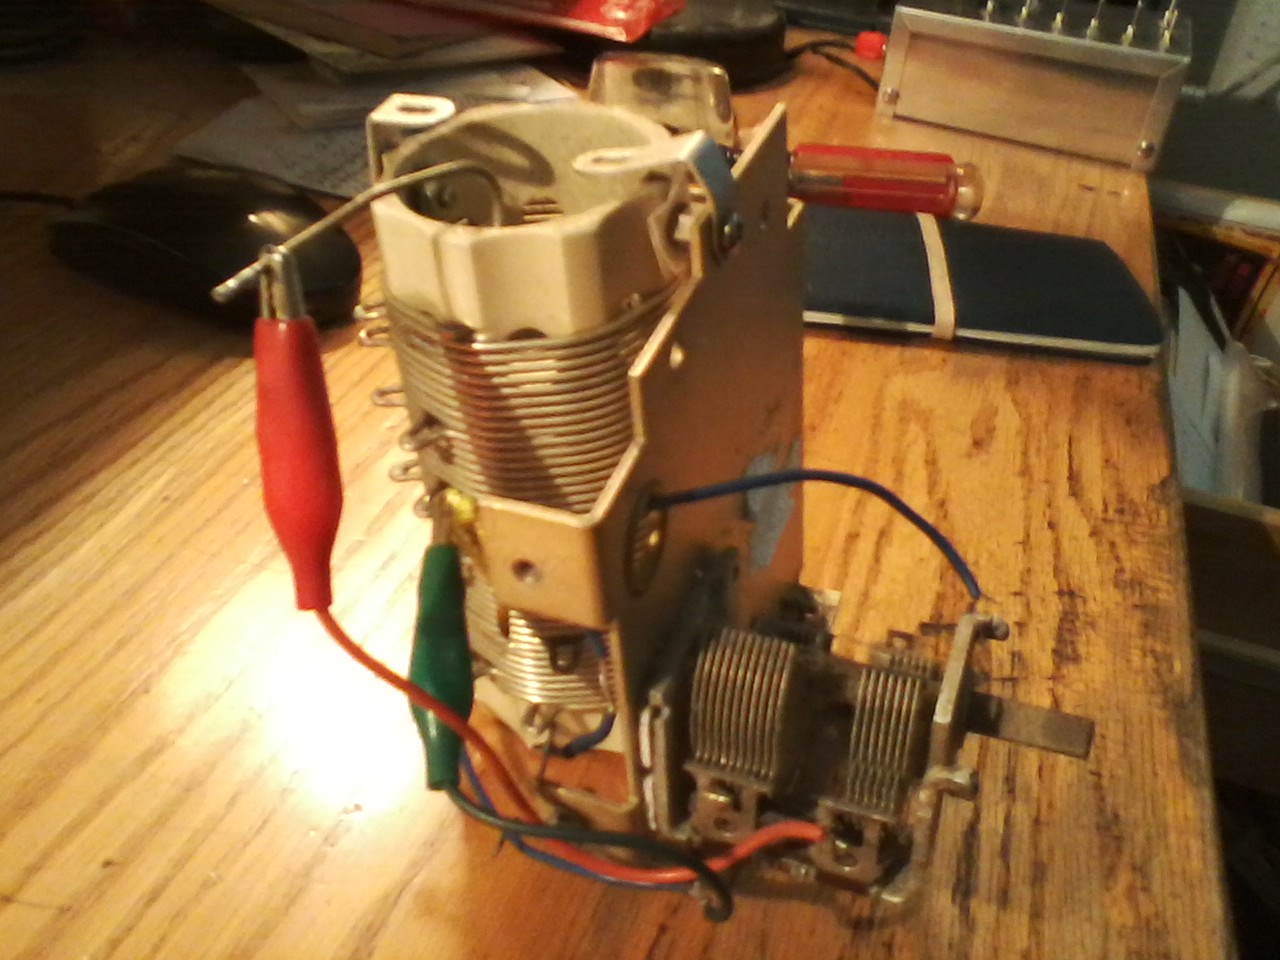
I've been using a real kludge of an antenna tuner for the past couple of years or so. Seriously kludge. It started as an C-L-C T-network built on and around a surplus coil, form, and chassis sub-assembly from something or other military. A couple of BCB 365 pF variable caps were tacked onto the assembly with double-sided tap. Real kludge. Seriously kludge. Then I started fiddling around with an simple 60' hunk of wire and 30' counterpoise. I saw that several tuners for this type antenna didn't require much more than an L-network, so I ditched one of the variables. And it worked! Not only that, but this antenna configuration worked very well both for stealth operating from the apartment and for portable ops.
The infamous kludge in all its hideous glory:
However, packing this tuner up with the rest of the station for either an afternoon of portable operating or my annual pilgrimage to the Adirondack Mountains wasn't much fun. Nothing was enclosed and the kludge tuner was as much as begging to be damaged in transit. It was even vunerable in the apartment. This was not a good thing. Clearly, something had to be done about this.
After having great results with the 60-foot EFHW and 30-foot counterpoise system, I started searching the Internet for a tuner suitable for them. In time, I narrowed the field of choices to three.
The Hendricks SLT+ tuner just presented itself to me whilst checking out the offerings on the QRPKITS.COM website. The schematic in the online assembly manual revealed the unit being a simple L network. Instead of manually tapping a coil, or a multi-position rotary switch and hardwired taps, or a roller inductor, this tuner has six individual toroidal inductors in BCD weighted values. The inductors are wired in series with a clever arrangement of DPDT switches allowing for an inductance range of 0.5-23.5 µH selectable in 0.5 µH steps. It's similar to the switching design philosphy of a step attenuator.
A similar circuit is used in the QRPme Tuna Tunah, with two distinct differences. One, the inductors are shorted out with SPST switches in the QRPme tuner (opposed to being switched out in the Hendricks tuner); and two, the variable capacitor can be switched to either the rig or antenna end of the tuner in the QRPme version. The switched capacitor allows for either high or low Z impedances presented by different wire lengths.
From across the pond, SOTABEAMS offered yet another similar design called the Adventure Tuner. To allow for high and low Z loads, this tuner ignores switching the capacitor by simply sticking BNC and binding posts on both ends of the circuit. Ingenious! Unfortunately the Adventure Tuner not longer appears to be available, as it's missing from the SOTABEAMS website.
Of the three, the SLT+ interested me the most, except for the price. Being both frugal and longing for a fresh project, I decided to forego trying to pry the money out of my billfold for the SLT+ and just build one up from the schematic.
For an enclosure, I picked the Radio Shack 270-238. Reasoning included availability, price, size suitability, and nostalgia.
Nostalgia?
Well, yes - nostalgia. I built my first SWR detector for the Monimatch in the "Bud version" of this enclosure back when such things were actually made in the United States of America by Americans instead of being farmed out to China. Don't get me started on China...
This enclosure apparently has been discontinued by Radio Shack, though a check of their website shows several others which would be suitable for this project.
The Hendricks kit uses a receiving type 365 pF poly-varicon capacitor. Though I've done the math and even at QRP power levels, I still don't trust that type of variable capacitor in RF transmitting applications for fear of the insulator material melting or flashing through. My guess is that Hendricks (and others) choice is based on price, physical dimensions, and availability.
Another consideration was that when using the kludge tuner wired as an L network with the 60 foot EFHW and 30 foot counterpoise, very little capacitance was needed to attain a 1:1 match. So it was with that empirically gathered evidence and dimensional restraints of using an air variable capacitor in the chosen enclosure that I chose 50 pF. If more capacitance were needed, a silver mica or two could be switched in parallel with the variable to get the range needed.
The 50 pF variable was donated by a benevolent, anonymous soul. I'll just say "Thanks, Joe!"
Toroid cores were gathered from Milestone Technologies and Cables and Connectors. Coils were wound with magnet wire I had left on hand from a Radio Shack three spool pack bought for some stealth antennas. How many antenna tuner coils out there in the world were once antennas in a former life? I'm guessing not too many. Though the gauges didn't match what the SLT+ manual called for, I used the closest logical size. Toroid winding charts showed an insignificant deviation from the design inductance. It's an L-network for HF QRP, for goodness sake; not something for a deep space mission.
Here's a great resource should you find yourself winding toroids: TOROID INDUCTANCE CHARTS - courtesy of renowned QRP'er and experimenter Michael A. Czuhajewski, WA8MCQ.
For ease of installation, I chose toggle instead of slide switches. Memories of first drilling and then filing, more filing, and MORE filing for the 10 slide switches in a homebrew RF step attenuator years ago turned me off to slides for this tuner. Both the SPDT and SPST toggle switches also came from Milestone Technologies (as did the BNC connector and binding posts). They are good quality and very reasonably priced.
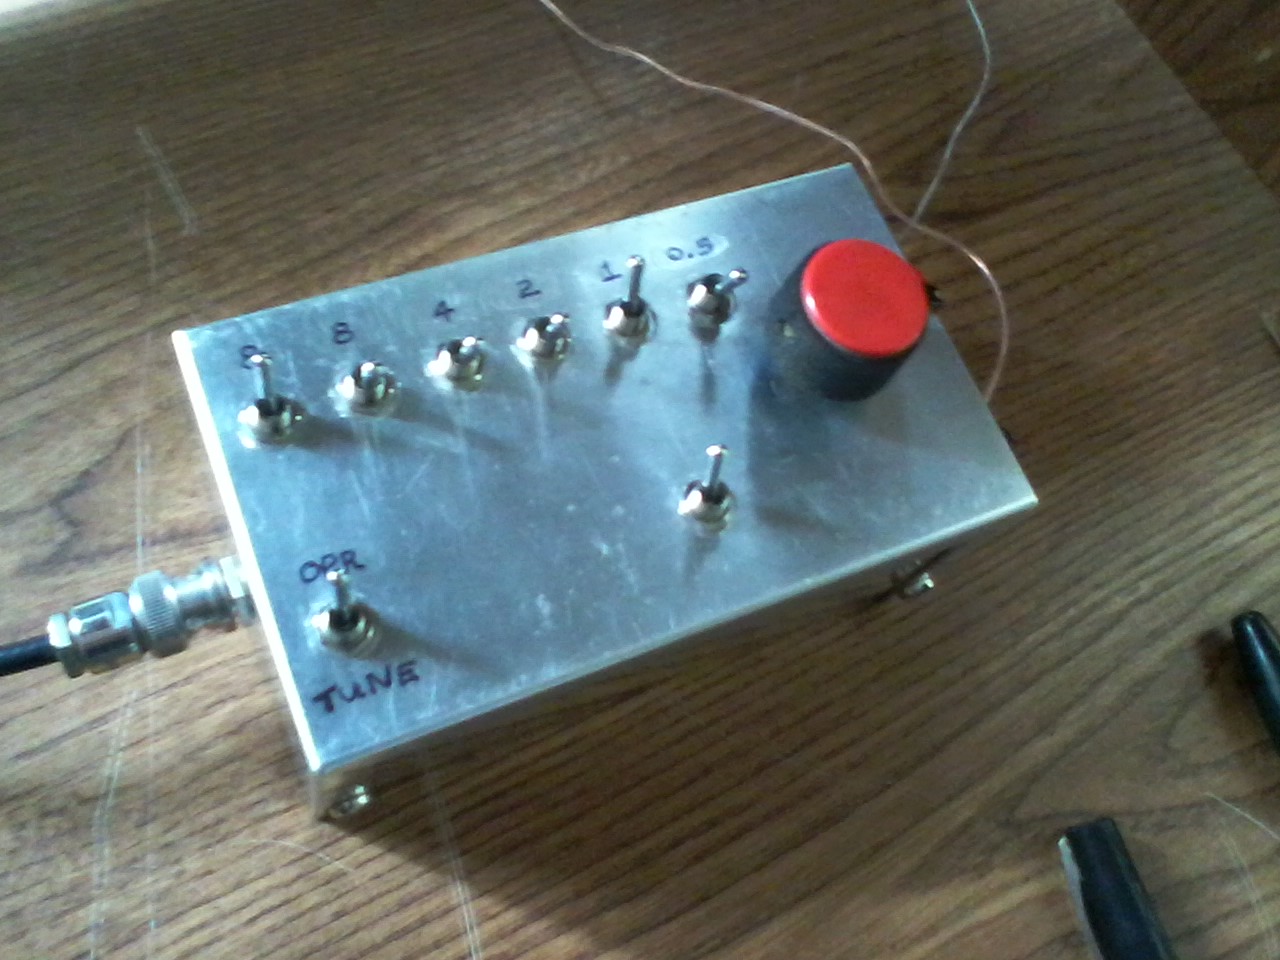
Here's the "kinda/sorta finished" tuner on the operating position for Field Day, 2015. Note that both the antenna and counterpoise wires are just some cheap, 24-gauge, speaker wire from Home Depot:
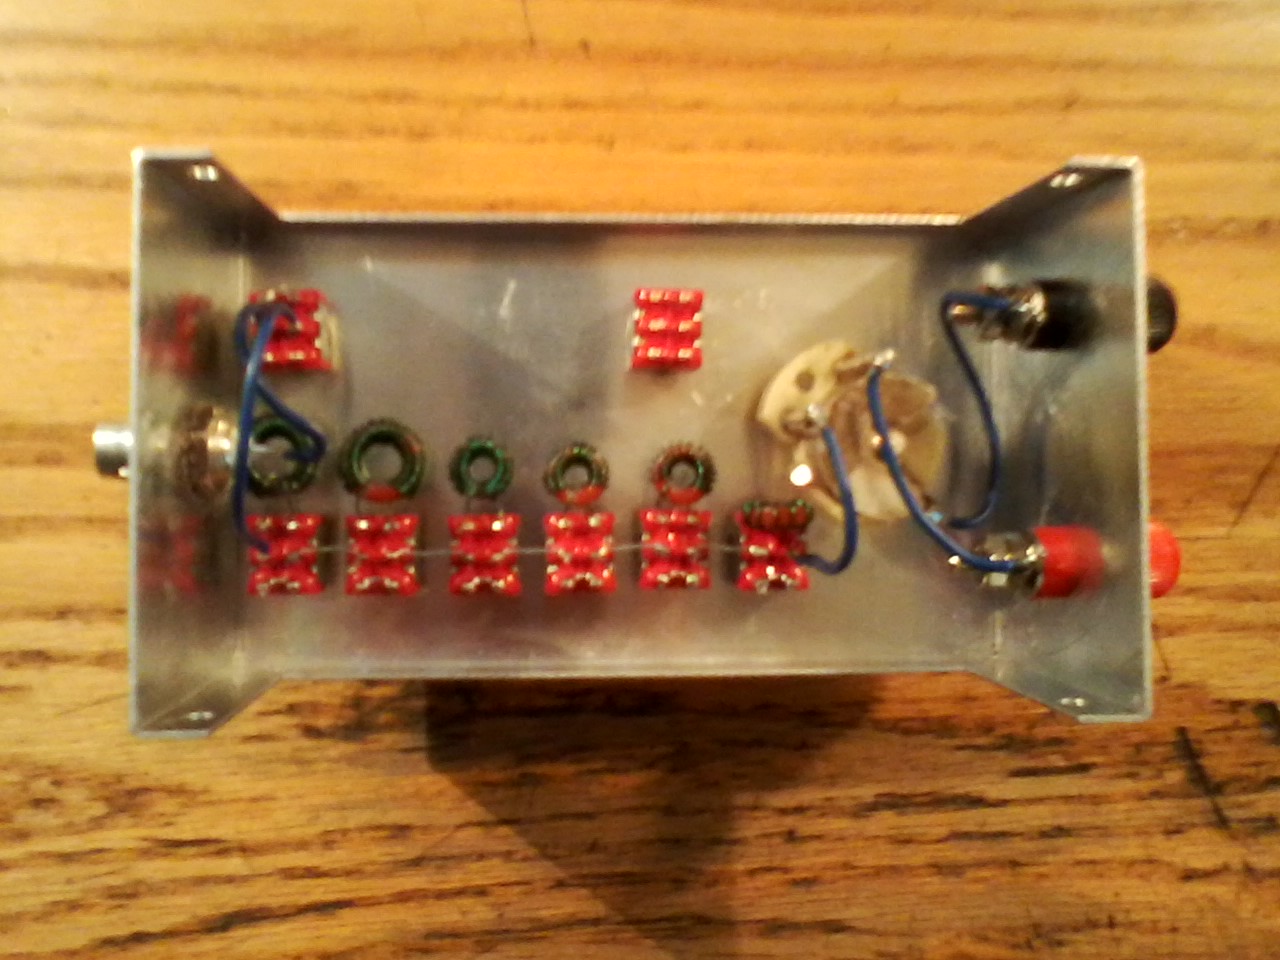
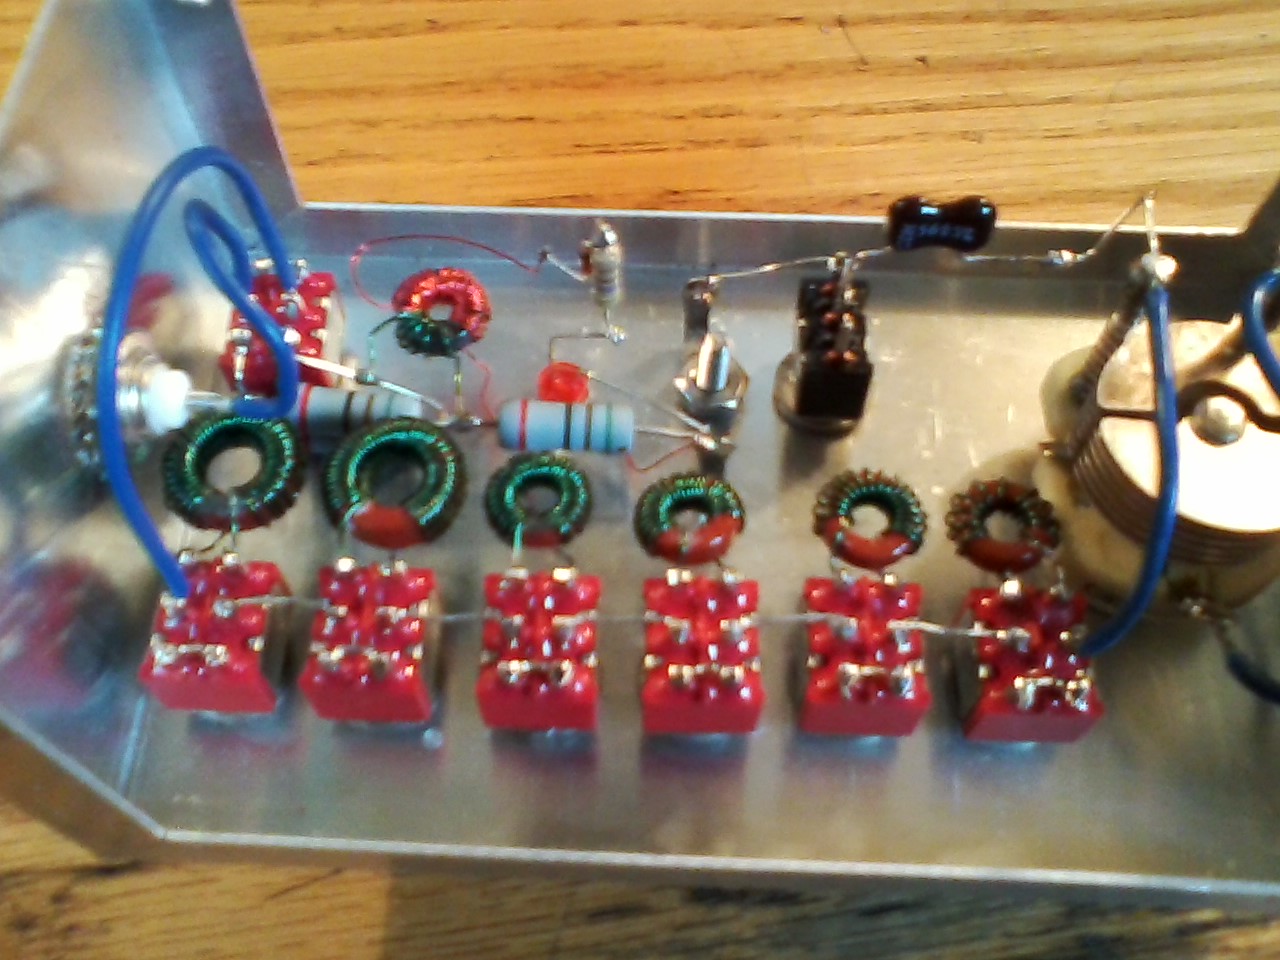
The "kinda/sorta finished" interior:
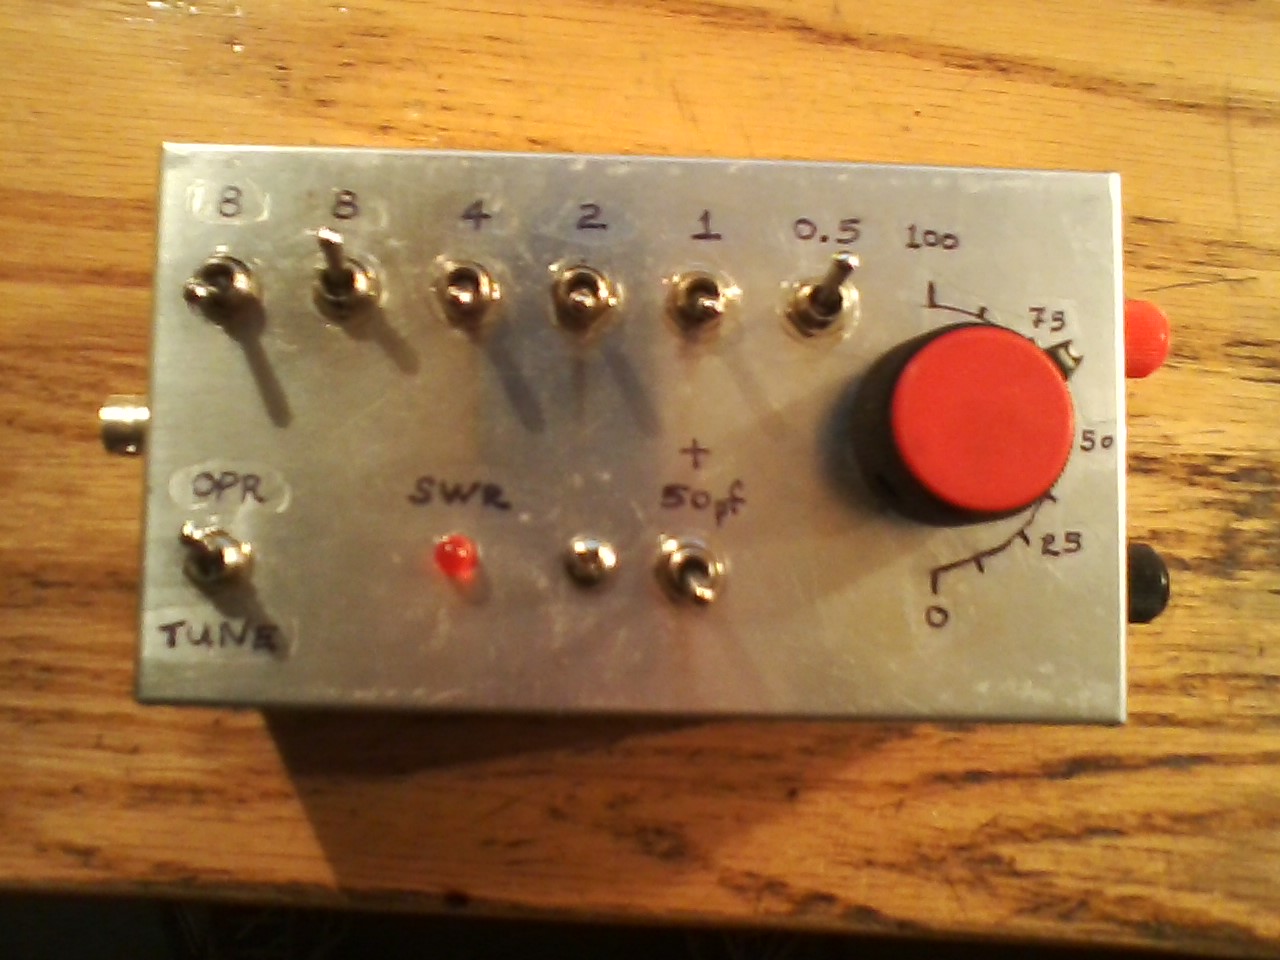
Here it is after the absorption type SWR sensor/indicator circuit and extra capacitor switching were installed. Labeling was done freehand with a Scripto extra fine point Sharpie (SC-UF) pen. Labels were then "painted over" with 3 coats of clear nail polish for some degree of protection.
And the updated internal shot. There's room for another capacitor and switch, so I'll be adding that soon.
Operation is easy. There's a chart for bands, wire lengths, and tuner settings in the SLT+ online manual. I just flip the OPR/TUNE switch to TUNE, which sends the RF first into the absorption SWR circuit and then the tuner and antenna. With the variable half meshed, I key my rig and switch in inductance until I see the LED dim. After a bit of back and forth with inductance settings and swinging the variable through it's tuning range, I aim for no LED illumination but settle for most dim settings. Switch to OPR and you're ready to operate.
Placement of the variable capacitor is a bit too close to the 0.5 uH inductor and switch. In retrospect with the advantage of hindsight, more patience and attention to layout would have helped.
The string of DPDT inductance switches could have been closer to the outside edge of the box to afford more room for the absorption SWR circuitry. Again - 20/20 hindsight. heh.
To really pick them nits, the binding posts could have been spaced to accept a molded banana plug pair. For my intended use, they're just fine the way they are.
A tip of the hat to Doug Hendricks, KI6DS and QRPKITS.COM for their unintentional nudge to borrow the SLT+ circuit for my tuner project. If you don't care to chase down parts, drill holes, and curse bad decisions, just order the kit from Pacific Antenna/QRP.COM. Or QRPme. Or the SOTA folks. If you're game for a bit more of a project, roll your own like I did!
All in all, it's a nice, unique, effective, little tuner. For what it's designed to tune, it does it well. And it's far more stow-worthy than it's predecessor - not to mention more presentable.
It is ... one "L" of a tuner!